Mastering Realistic Hair in Procreate
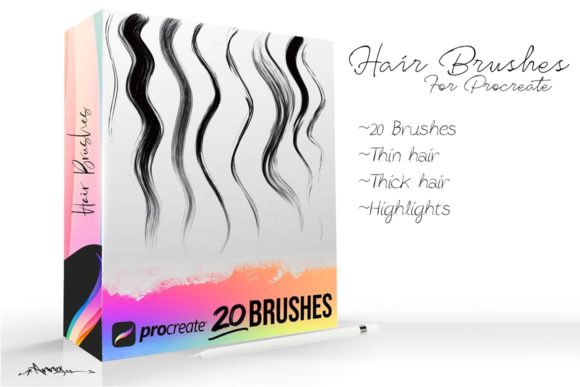
Digital illustration often hits a wall when artists attempt to render hair. It is one of the most complex textures to replicate because it involves thousands of individual strands moving in unison yet retaining unique characteristics. This is where specialized Procreate Hair Brushes become an indispensable tool for creators. Whether you are sketching a quick character concept or finishing a high-end portrait, having the right digital tools can transform a flat, lifeless drawing into something vibrant and tactile. These brushes are designed to mimic the natural flow, weight, and variation of real hair, allowing you to move from thick to thin strands, short or long, straight or curly with incredible ease.
The primary appeal of using dedicated hair brushes lies in their ability to save time while enhancing quality. Traditionally, painting hair required manually drawing every single line, a process that was not only tedious but often resulted in stiff, unnatural-looking results. Modern brush sets for Procreate 4 and up leverage the app's advanced stroke stabilization and texture engines to automate much of this complexity. When you swipe your stylus, the brush engine varies the opacity, width, and direction of the stroke automatically. This means you can focus on the overall shape and lighting of the hairstyle rather than getting bogged down in microscopic details.
Why Specialized Brushes Change the Game
For beginners and professionals alike, the learning curve for rendering hair can be steep. Generic round brushes often lack the tapering necessary to create realistic ends, leading to drawings that look like solid blocks of color rather than flowing locks. High-quality Procreate Hair Brushes solve this by incorporating dynamic shape properties. As you lift your pencil off the screen, the stroke naturally tapers to a fine point, mimicking how a real strand of hair ends. This subtle detail makes a massive difference in the final polish of your artwork.
Furthermore, these tools offer versatility that generic brushes simply cannot match. A single brush set might allow you to paint coarse, wiry textures for a rugged beard one moment, and soft, silky waves for a fantasy character the next. The ability to adjust settings like size, opacity, and flow within the app gives you granular control. You aren't just stamping a pre-made image onto your canvas; you are painting with a tool that responds to your pressure and speed, creating a more organic and human feel to the work.
Practical Applications Across Different Fields
The utility of these brushes extends far beyond fine art portraits. For freelancers and small business owners creating branding materials, realistic character avatars can add a personal touch to logos and social media assets. Bloggers and content creators often need custom illustrations to break up text or highlight specific points, and having the ability to quickly whip up a character with stylish, well-rendered hair adds a layer of professionalism to their posts.
In the realm of education, teachers and instructional designers can use these tools to create engaging visual aids. Imagine a biology textbook illustration showing different hair types across various ethnicities, or a fashion design course where students learn to drape and style digital garments on models with realistic hair. The precision offered by these brushes ensures that educational materials are both accurate and visually appealing.
Even for hobbyists who draw purely for relaxation, the experience of creating beautiful hair can be deeply satisfying. There is a meditative quality to laying down long, sweeping strokes that form a perfect braid or a windswept ponytail. It turns a potentially frustrating part of the drawing process into an enjoyable rhythm.
From Concept to Final Render
When starting a new piece, many artists make the mistake of jumping straight into details. A better approach involves blocking in the major shapes first. Use a larger, softer brush to establish the volume and silhouette of the hair. Once the foundation is set, switch to your specialized Procreate Hair Brushes to define the flow. Start with the mid-tones, following the direction of growth. Remember that hair grows from the scalp and falls according to gravity and styling.
As you build up layers, utilize the "thick to thin" capability of the brushes. Press harder at the root where the hair is denser, and lighten your touch as you move toward the tips. This pressure sensitivity creates a natural gradient that implies depth without needing to paint every individual strand. For curly or wavy styles, use shorter, rhythmic strokes rather than long lines. This helps capture the bounce and structure of curls, preventing them from looking like tangled spaghetti.
Lighting plays a crucial role in selling the realism. After establishing the base colors and strands, add highlights on a separate layer using a lighter shade. Focus these highlights on the highest points of the curves where light would naturally hit. A pro tip is to lower the opacity of your highlight layer slightly to blend it seamlessly with the underlying texture. This technique works exceptionally well with brushes designed for Procreate 4 and up, as they handle blending modes smoothly.
Important Considerations Before You Start
While these tools are powerful, they are not magic wands. Understanding the underlying anatomy of hair is still essential. No brush can fix a fundamental misunderstanding of how hair clumps together or how it interacts with light. It is important to study reference photos of real people. Notice how hair parts, how it thins out at the temples, and how different textures reflect light differently. Use the brushes to enhance your observation, not replace it.
Compatibility is another factor to keep in mind. Ensure your device and software version support the features these brushes utilize. The prompt notes that these specific tools are optimized for Procreate 4 and up. Using them on older versions might result in missing features like streamline stabilization or specific grain textures, which could hinder your workflow. Always check the requirements before downloading or purchasing new assets.
Additionally, avoid overusing the texture. It is tempting to go crazy with the strand details, but sometimes less is more. In a full-body illustration viewed from a distance, excessive detail can make the image look noisy and cluttered. Reserve the finest, most detailed brushwork for close-up portraits or focal points. For background characters or distant figures, suggest the texture of hair with broader strokes and let the viewer's eye fill in the rest.
- Variety is key: Don't rely on just one brush. Mix different textures to create depth and interest within a single hairstyle.
- Layer management: Keep your base colors, shadows, highlights, and fine strands on separate layers. This allows for non-destructive editing later.
- Color choice: Avoid using pure black for shadows or pure white for highlights. Use deep blues or purples for shadows and warm creams for highlights to keep the hair looking vibrant.
- Practice flows: Spend time practicing simple S-curves and C-curves to get a feel for how the brush responds to your hand movements.
Ultimately, mastering digital hair is about finding the balance between technical skill and artistic intuition. Procreate Hair Brushes provide the technical foundation, handling the intricate details of tapering and texturing so you can focus on the artistic vision. Whether you are crafting a whimsical storybook character, designing a marketing mascot, or simply exploring your creativity, these tools empower you to bring your ideas to life with confidence. With the right approach and a bit of practice, you will find that rendering everything from tight coils to flowing silks becomes not just manageable, but genuinely enjoyable.