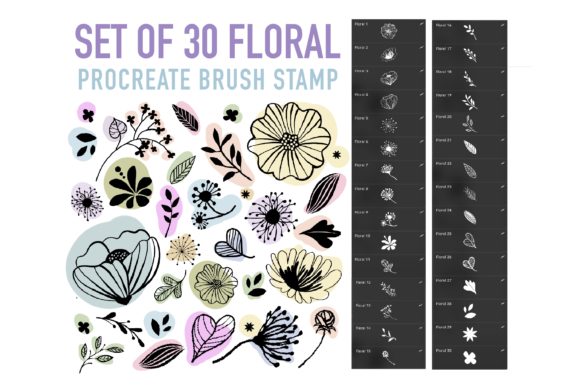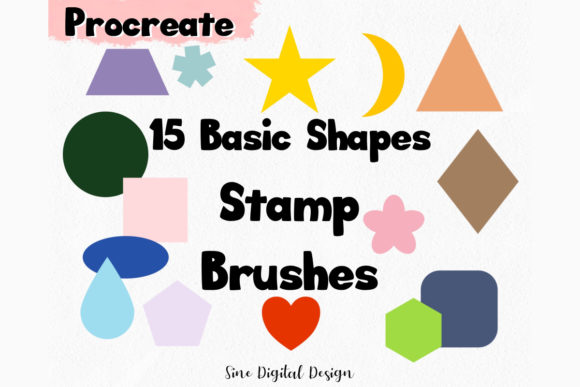
Mastering Geometry: A Practical Guide to Basic Shapes Stamp Brushes Procreate
Digital illustration often feels like a balancing act between creative freedom and technical precision. Whether you are designing a logo, creating pattern repeats for fabric, or sketching architectural concepts, the foundation of your work usually relies on geometry. This is where Basic Shapes Stamp Brushes Procreate become an indispensable tool in your digital arsenal. Instead of manually drawing perfect circles or squares every time, which can lead to wobbly lines and inconsistent sizing, these specialized brushes offer instant, crisp geometric forms. However, simply downloading a set of 15 geometric stamps does not guarantee professional results. Many creators, from hobbyists to seasoned freelancers, fall into common traps regarding how they integrate these tools into their workflow, often undermining the very efficiency the brushes are meant to provide.
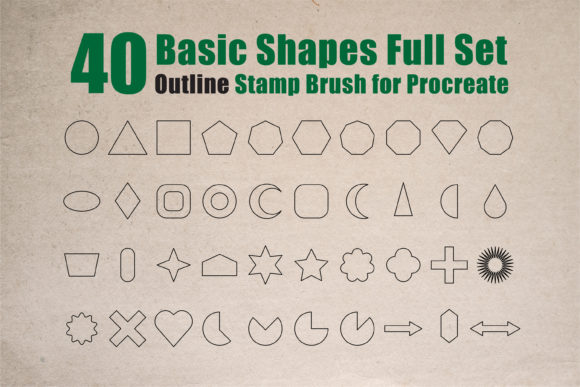
The primary appeal of this specific brush set lies in its simplicity and immediacy. As a digital file available for instant download, it removes the barrier of entry for those who need reliable shapes without the steep learning curve of vector software. The set includes a single .brushset file containing 15 distinct stamps, covering the essential vocabulary of geometry. Yet, a frequent misunderstanding occurs right at the installation phase. Users often expect these brushes to function across various drawing applications. It is crucial to remember that these brushes can be used with the Procreate app only. Attempting to import them into Photoshop, Clip Studio Paint, or other raster programs will result in frustration and wasted time. Before purchasing, verify that your primary workspace is indeed Procreate on an iPad. This compatibility constraint is not a limitation but a specialization; these brushes are optimized to leverage Procreate's specific rendering engine, ensuring the highest quality output when used within that ecosystem.
Avoiding the Trap of Over-Reliance and Static Design
Once installed, the most common mistake artists make is treating stamp brushes as a crutch rather than a component. There is a tendency to populate an entire composition with these pre-made shapes without modification, leading to artwork that feels sterile, repetitive, and obviously "stamped." While the 15 included shapes are versatile, using them at 100% opacity and default size for every element kills the organic feel of hand-drawn art. The result is a presentation that lacks depth and character, which can be detrimental for marketers or bloggers trying to establish a unique brand identity.
To avoid this flat aesthetic, you must approach these stamps as building blocks, not finished products. A better approach involves utilizing Procreate's transformation tools immediately after stamping. Rotate the shapes to break uniformity, adjust the hue and saturation to create color variation, or lower the opacity to blend them into textured backgrounds. For instance, if you are an educator creating visual aids, using identical triangles for every example might confuse students due to lack of context. Instead, vary the scale and rotation of the Geometric Shapes Brushes to create a dynamic layout that guides the eye naturally. Remember, the goal is efficiency, not automation of creativity.
Technical Pitfalls: Resolution and Scalability
Another critical area where users stumble is regarding resolution and scalability. Since this is a digital product with no physical item sent, the quality of your final output depends entirely on your canvas settings within Procreate. A common error is creating a small canvas initially, stamping the shapes, and then attempting to enlarge the entire artwork for print later. This leads to pixelation and blurry edges, ruining the crispness that geometric shapes demand. This mistake directly affects the professionalism of your deliverables, whether you are a small business owner printing business cards or a freelancer selling wall art.
The corrective measure is straightforward but often overlooked: always start with a canvas size that matches your intended final output, preferably at 300 DPI for print projects. When using Procreate Stamp Brushes, the vector-like sharpness is maintained only if the source canvas is sufficiently large. If you find yourself needing to resize a stamped shape frequently, do so while it is still on its own layer before merging. Furthermore, ensure you are using the most updated version of Procreate. Older versions may not support the latest brush engine features utilized in this set, potentially causing lag or rendering artifacts. Updating your app is a free and simple step that ensures you are getting the best quality and performance from your digital purchase.
Licensing and Ethical Usage for Professionals
For entrepreneurs and content creators, understanding the licensing terms of digital assets is as important as the artistic application. The inclusion note for this set states clearly: Use these brushes for any artwork of your projects. This grants you significant freedom to incorporate the resulting images into commercial works, client projects, or personal portfolios. However, a severe misunderstanding arises regarding the distribution of the tool itself. The license explicitly prohibits sharing or reselling the brush file to others.
Violating this term not only breaches ethical standards but can also lead to legal repercussions and damage to your professional reputation. Some users mistakenly believe that because they purchased the file, they own the rights to redistribute it as part of their own "toolkit" or sell it on third-party marketplaces. This is incorrect. You are purchasing the right to use the output of the brushes, not the brushes themselves as a commodity. To stay compliant, keep the .brushset file for your personal use only. If a colleague or team member needs these tools, encourage them to purchase their own license. This supports the developer and ensures that everyone has access to updates and proper documentation.
Maximizing Workflow Efficiency
Ultimately, the value of the 15 Basic Shapes Stamp Brushes lies in how they streamline your workflow. When used correctly, they eliminate the tedious process of constructing grids, aligning nodes, or correcting asymmetrical lines. This saved time can be redirected toward refining concepts, experimenting with color palettes, or managing client communications. However, efficiency is lost if you spend excessive time searching for the right shape within the brush library or struggling with incompatible file formats.
To maximize utility, organize your brush library logically. Create a dedicated group in Procreate labeled "Geometry" or "Stamps" and place this set there. This reduces cognitive load during the creative process. Additionally, take a moment to test each of the 15 stamps on a scratchpad layer upon installation. Understand how each shape reacts to pressure (if applicable) or how they tile. Some shapes may be designed specifically for pattern making, while others serve as structural anchors. Knowing these nuances beforehand prevents mid-project interruptions. By treating these brushes as a strategic asset rather than a novelty, you elevate the quality of your digital art and maintain a professional standard that resonates with your audience.
In conclusion, integrating Basic Shapes Stamp Brushes Procreate into your routine offers a powerful way to enhance precision and speed. By respecting the software limitations, avoiding static design habits, maintaining high-resolution workflows, and adhering to licensing agreements, you transform a simple digital download into a cornerstone of your creative process. Whether you are a beginner taking your first steps in digital art or a pro looking to tighten up your geometric compositions, mindful usage of these tools will yield cleaner, more professional, and visually compelling results.