Unlocking Creative Potential with 3D Balloon Stamp Brush Procreate Vol.1
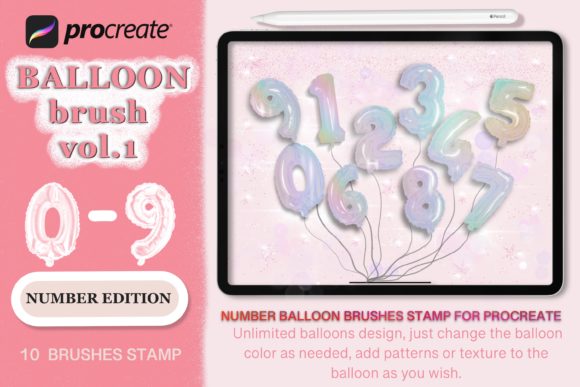
Digital illustration has transformed how we approach seasonal design, turning what used to be hours of vector tracing into a fluid, intuitive process. At the heart of this shift for many holiday creators is the 3D Balloon Stamp Brush Procreate Vol.1. This toolset is designed specifically for building custom 3D number balloon characters, catering to a wide range of projects from Christmas clip art and New Year greetings to personalized birthday apparel. However, simply downloading a brush set does not guarantee professional results. Many users, ranging from hobbyists to small business owners, often stumble over avoidable pitfalls that limit the utility of these powerful assets. Understanding the nuances of this specific volume can mean the difference between a generic-looking graphic and a standout piece of home decor or merchandise.
The primary appeal of this collection lies in its modularity. Unlike static PNG stamps that offer a single fixed look, this volume includes different parts of the number font, allowing you to construct unique balloon arrangements. You are not just stamping an image; you are building a character. Yet, a common misunderstanding arises when users treat these brushes like standard painting tools rather than construction elements. Some beginners attempt to paint freely without utilizing the specific "building block" nature of the stamps. This approach often leads to inconsistent lighting and perspective, making the final 3D effect look flat or disjointed. To maximize efficiency and quality, it is crucial to view each stamp as a puzzle piece. Start by laying down your base numbers, then layer the highlights and shadows provided in the set to create genuine depth.
Avoiding Common Design and Technical Pitfalls
One frequent error involves color management. The package allows you to change colors as you like directly within the Procreate app, offering endless customization. However, a significant mistake occurs when creators ignore color theory while swapping hues. Because these brushes simulate a glossy, reflective surface typical of foil balloons, the underlying value structure is vital. If you choose a neon yellow for the base but fail to adjust the shadow stamp to a corresponding deeper tone, the balloon will lose its three-dimensional integrity and appear pasted on. A better approach is to use the "Reference" feature in Procreate or create a simple gradient map before applying the stamps. This ensures that your custom reds, golds, or silvers maintain the necessary contrast between light and dark areas to sell the illusion of volume.
Another overlooked detail concerns file formats and intended usage. The product description mentions a ZIP archive containing .brushes file formats, which are native to Procreate. Some users mistakenly assume these files can be directly imported into other software like Adobe Illustrator or Canva without conversion. While the end result can be exported as an image for use in those programs, the editing flexibility exists primarily within Procreate. Trying to force these dynamic brushes into a static workflow too early can lead to frustration. The most efficient workflow is to complete your entire composition, including color changes and layering, inside Procreate first. Once satisfied, export your design as a high-resolution PNG with a transparent background. Only then should you move the file to other platforms for placing on T-shirts, cups, or card stock.
Maximizing Versatility for Commercial and Personal Projects
When utilizing these tools for commercial purposes, such as creating vinyl decals or print-on-demand apparel, resolution and scale are critical. A common misstep is designing at the default canvas size, which may be too small for large-format printing like wall decorations or banners. Before you begin stamping your New Year or Christmas designs, check your canvas settings. Ensure you are working at 300 DPI (dots per inch) if the final output is intended for physical printing. Designing at 72 DPI might look fine on an iPad screen but will result in pixelated, unprofessional edges when printed on a t-shirt or sticker. Taking a moment to set up your workspace correctly prevents the need to redo work later, saving both time and potential costs associated with wasted materials.
Furthermore, the versatility of the 3D Balloon Stamp Brush for Procreate vol.1 extends beyond just numbers. Creative entrepreneurs often limit themselves by only using the stamps for dates. Consider combining these balloon elements with other assets, such as the mentioned Gnome brush options or additional clip art, to create complex scenes. For instance, a birthday card could feature a 3D balloon age number floating next to a hand-drawn gnome holding a gift. The key is layering. Do not be afraid to place elements behind the balloons to create depth, or add hand-drawn strings and weights to ground the floating numbers. These small additions elevate the design from a simple stamp application to a cohesive illustration.
It is also essential to respect the licensing terms associated with digital assets. The note "All rights reserved © 2020 eDigitalStudio" indicates specific ownership. While many such packages allow for commercial use in finished products (like selling a shirt with the design), they often prohibit reselling the brush files themselves or claiming the raw assets as your own. Always review the included license file within the ZIP archive. Misunderstanding these terms can lead to legal issues for freelancers and small business owners. Treat the brushes as tools in your workshop, not the product itself. Your value comes from how you combine, color, and contextualize these tools into unique designs for your clients.
Practical Steps for Better Results
To ensure you get the most out of your download, follow a structured approach before diving into creation:
- Verify Compatibility: Ensure your iPad and Procreate version are up to date to support the latest brush engine features used in the .brushes file.
- Test Colors First: Create a swatch palette of your intended holiday colors (e.g., Christmas red and green, or New Year gold and black) and test a single number stamp to see how the lighting interacts with those specific hues.
- Organize Layers: As you build your number characters, keep different parts (base, shine, shadow, string) on separate layers. This non-destructive workflow allows you to tweak the position or opacity of specific elements without ruining the whole design.
- Check Export Settings: Before sending files to a printer or uploading to a mockup generator, zoom in to 100% to check for any stray pixels or jagged edges that might have occurred during the coloring process.
Ultimately, the 3D Balloon Stamp Brush Procreate Vol.1 is a robust resource for anyone looking to streamline their holiday design workflow. Whether you are crafting personalized gifts, designing marketing materials for a local event, or building a portfolio of festive clip art, the quality of your output depends on how well you understand the tool's mechanics. By avoiding the traps of poor color selection, incorrect canvas setup, and workflow inefficiencies, you can produce polished, professional-grade graphics. The options are indeed endless, but they require a thoughtful, informed approach to truly shine. Embrace the learning curve, experiment with the modular parts, and let your creativity drive the next generation of DIY 3D number balloon designs.